

A customer asked us to get their Azure costs onto their Power BI Dashboard. This was a significant monthly cost for them so they wanted to see it growing each day and to track it. The customer had access to Costs & Billing in the Azure Panel but wasn’t an enterprise customer so couldn’t use the off-the-shelf plugin which is restricted and needs a Billing Scope ID. So we did it like this:
- Export costs from Azure panel to Blob Storage every day into a CSV format
- Connect to Blob storage from Power BI
- Browse to the correct folder
- Sort the CSV files into the newest first
- Keep the file we want, deleting the rest
- Transform that file and build the report
Step 1 – Export Azure Costs
The first step was to export the Azure cost data on a daily basis. From the Azure panel, head to Cost Management & Billing and then Cost Management
On the left navigator is Exports. Click into this.
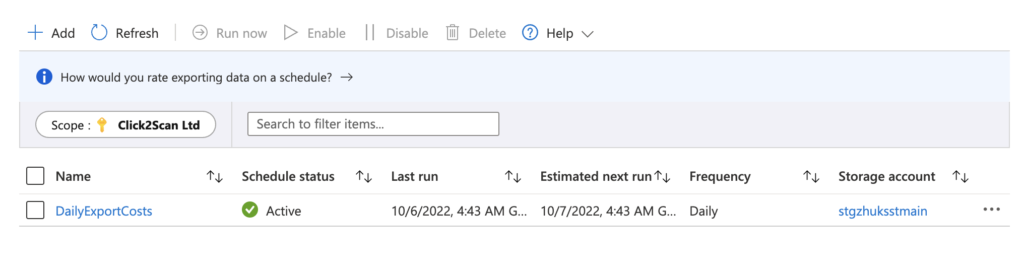
You will need to to click Add and create an export. First though you may need to crearte some Blob Storage or know which Blob storage area you plan to save your file in. Once setup your costs will be exporting to a CSV file in Blob storage every day.
Step 2 – Azure Blob Storage
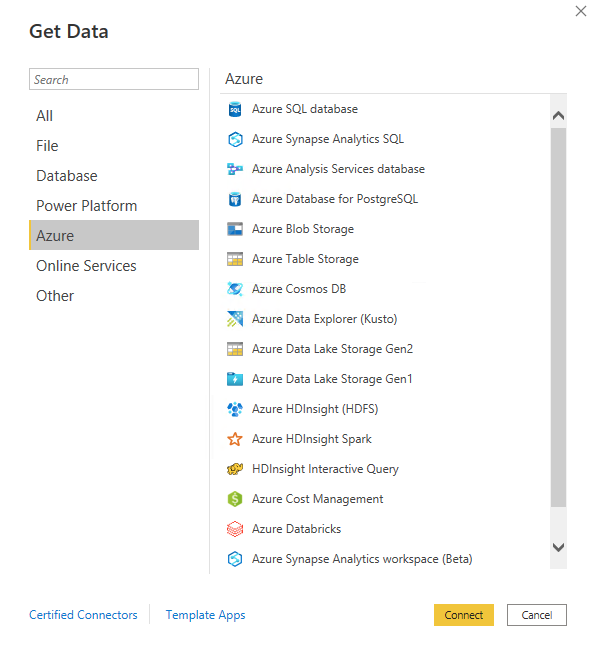
Now we have the CSV files in the folder we need to setup PowerBI. So from your project (we used the Desktop app), connect to Blob storage. There are plenty of articles about connecting to Blob storage from Azure, but we used Account Key access.
Steps – Get Data > More > Azure Blob Storage as shown below
Step 3 – Power BI Transformations
Once you are connected and you can navigate into the right folder, you need to get the transformations set correctly. Ours are like this:
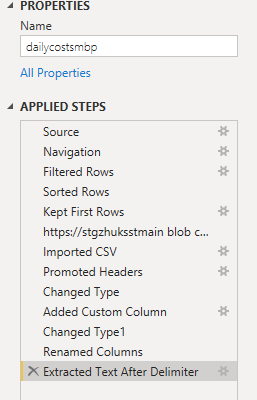
Source & Navigation are simple – thats getting us to the correct folder.
Filtered Rows – this may need some additional work as you need to make sure you are getting the latest files and filtering out unwanted files especially when you swap into new months. The code / settings for this is as below:

At the time of writing – this is filtering out September CSV files leaving me with just October ones. As you have no control over the filename or the folder structure Azure uses, you have to work with the last modified to get to the CSV file you want.
Sorted rows just gets us to the newest first and then Keep First Row allow us to ignore the older CSV files. These are all Tranformations in the menu bar. The next steps are down to you and what you want to keep or Tranform. The main thing here is this third step to only work with the newest file.
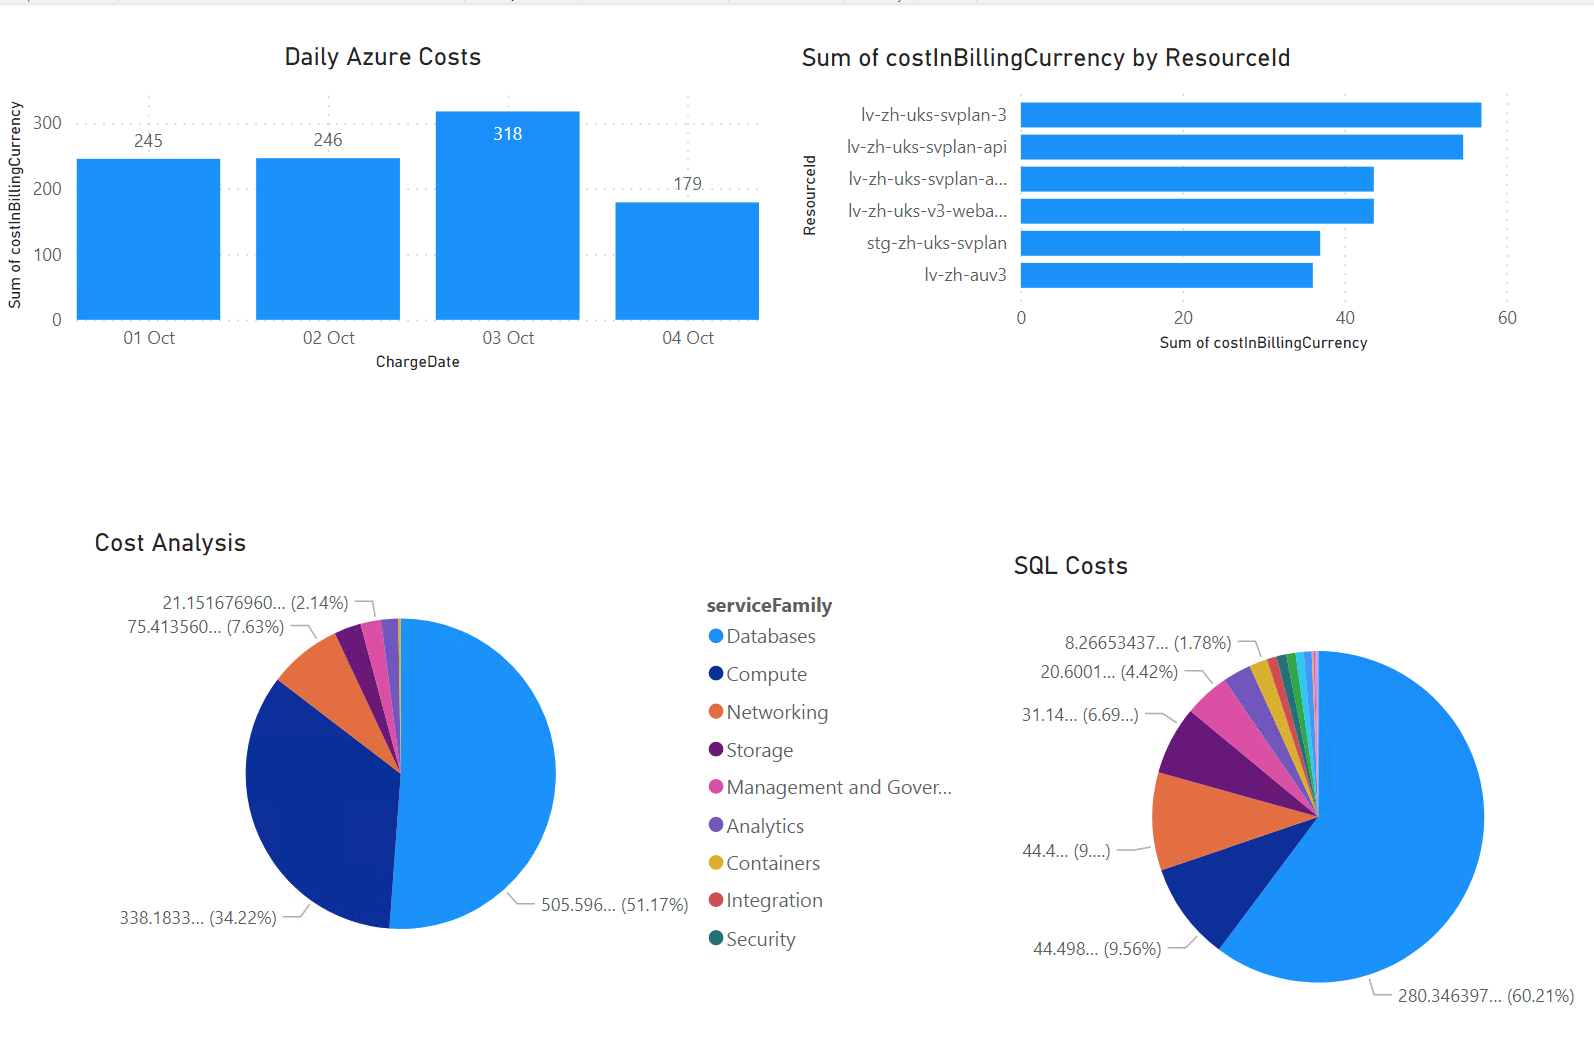
Step 4 – Power BI Visuals
Create your project. Like all Power BI projects this is the fun bit, but we wanted to major on the daily costs and the largest costs with a report like this:

Leave a Reply